Signed Distance Fields
Unreal’s Material Editor has always been an area of fascination for me. The whole concept of HLSL, UVs, and all the magic you can do by manipulating them has led me to learn all kinds of concepts and tricks applicable to creating materials and UI. Understanding and applying these concepts has been incredibly useful in my career and in my ability to rapidly iterate and prototype with limited resources.
It’s no wonder then I became obsessed with the concept of SDFs (Signed Distance Fields). Creating blendable shapes that can be manipulated at runtime has no end of practical uses, and going through the logic of each formula and getting that “Eureka” moment when you understand what is actually happening when you introduce a new instruction is extremely satisfying to me.
I’d already been familiar with some of the more basic SDFs. Knowing how to create circles and rectangles had been useful arrows in my quiver for some time. But it was only when I found some resources from Ben Cloward (an experienced Technical Artist) and Inigo Quilez (the leading authority on SDFs online) that I really started to expand my knowledge. I found myself motivated. I wanted to apply what I’d been learning and reading about to my work in Unreal, but more than anything I wanted to understand how each shape was made. Inigo provides a comprehensive guide to various SDF functions on his website, so I thought, why not translate them to Unreal’s Material Editor. I could learn a little about HLSL and SDFs in one go.
So that’s exactly what I did. I went through line by line and broke down each formula into Unreal Material nodes. The process was difficult at times, but immensely satisfying once the math started clicking for me and I could visualise exactly what the instruction was doing. By the end of a few fun weeks I had a whole bunch of new knowledge about an area of development I was interested in, and 17 useful Material Functions.

I went on to publish my results as a asset pack available on Itch.io and Fab. I’ve used the fruits of this exercise in multiple contexts both in my professional career and my hobbyist endeavours.
I want to share a few of my favourite examples, for no other reason other than I like to talk about them 😊.
Tiling Pool Material

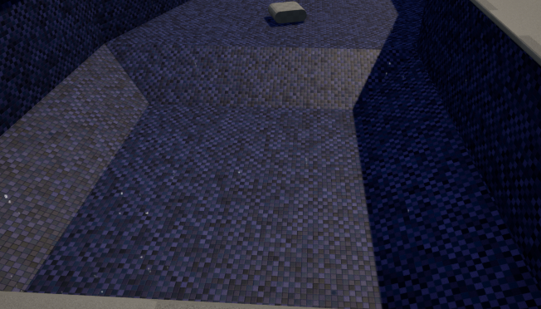
The first example I want to share is a mistake! Don’t use SDFs for small details in PBR Materials! I initially tried to create this pool tile material using solely SDFs for the tiles and grouting. ‘Wow’ I thought, ‘Think of the memory savings by not using textures’. But it turns out sometimes we need textures. MinMaps are important for scaling down detail at a distance, otherwise Unreal is trying to render all those SDFs in single pixels, which does not look good…
Repetitive grids and lines can create a visual phenomenon called the Moire Effect.

Not what I wanted the player to be seeing in my little project that took place entirely in a pool surrounded by repetitive grids and lines. I replaced the SDFs in the material with some textures that scaled resolution at distances, and some other shader instructions to blend out details that wouldn’t be visible at distance anyway, and would only contribute to the Moire. I still do use a little shader magic to add checkerboard and randomness to the tiles themselves.

I’m happy with the final result, now to finish the rest of that project…
Ghost Icon
We needed an editor icon for a level design tool focused on supernatural phenomena. Something simple and identifiable that could communicate the purpose of the Actor at a glance.

They let me have a little fun with it and i think it gets the point across.
Colour Wheel
I was curious how hard it was to build the "Colour Wheels" you might see in customisation screen or art program. As it turns out, with a few SDFs, some Curves, and a little widget input, it’s not very hard at all.
This was a fun little jam I did over a weekend just to see if I could do it. I’ll be honest SDFs are used here only for the shapes, I just like showing this one off.
Phone Icon
We needed a rotating phone icon for some prototyping GUI. I took it as a challenge to test out my SDF knowledge.

This was a fun exercise. I wanted to be able to believably represent a 3D animation in 2D, and I think via some offset sine curves and clever timing, I accomplished that.